Part 2: How to Fold Pleats
Pleats in clothing are places where fabric is folded back on itself to create more volume in a smaller length of fabric. It’s basically a zig-zag of fabric layers. Pleats are put to a lot of use in hakama in the front and back sections alike. This section provides a basic instruction of how to make knife pleats and box pleats while the instructions for how to assemble hakama completely are in the next section.
Knife pleats
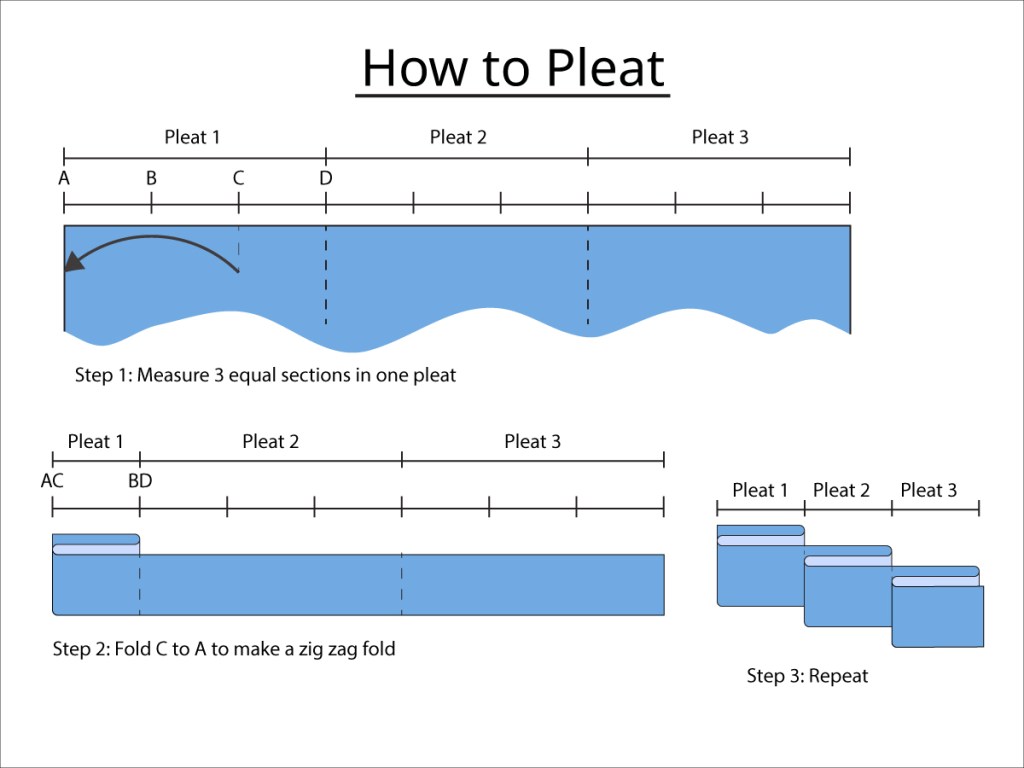
Most basic pleats take a length of fabric and shorten it to a third of the length. To make a knife pleat:
- mark four points on a length of fabric. (A, B, C, D)
- Move point C to meet with point A and Point D to meet point B.
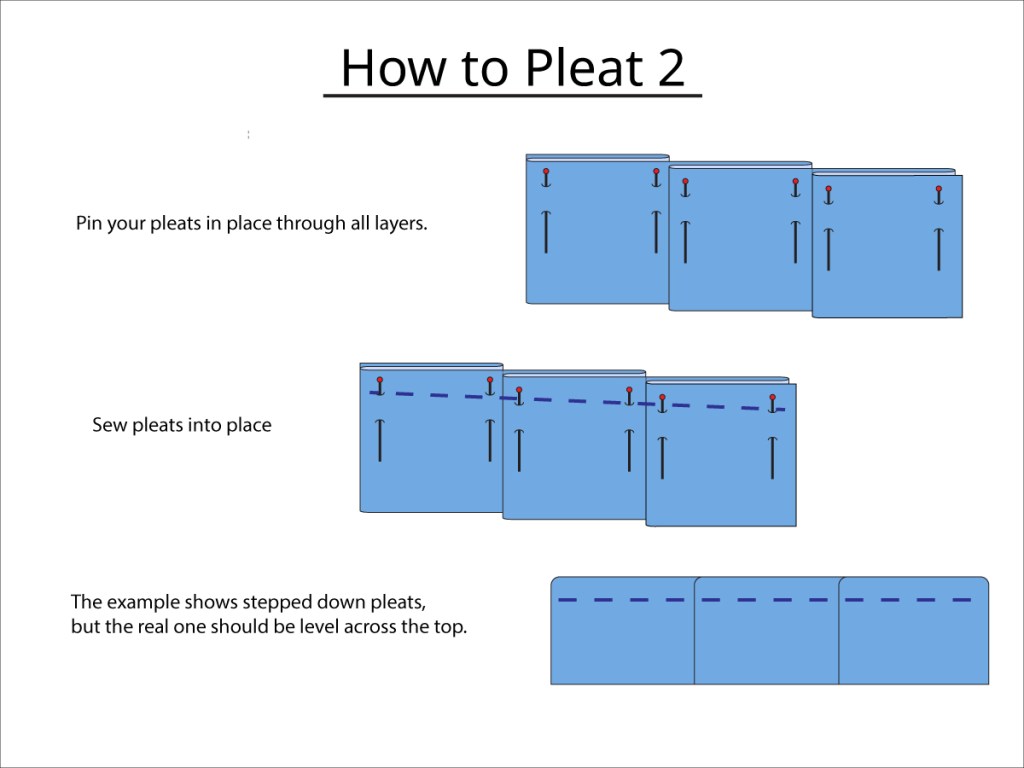
- Pin down the fabric through all three layers at two spots to make sure nothing shifts.
- Sew the pleat along the top of the fabric to secure the entire pleat.
The fold point on the top layer (point C) is called the “peak” of the pleat. When someone talks about which way a pleat is pointing, they are usually referring to the direction that the peak is pointing. This will be important for…
Box Pleats
Box pleats are basically two knife pleats which have their peaks facing each other and touching (so that the inside of the pleats form a sort of box!) These are constructed very similarly. For example, to make a box pleat:
- Mark 8 points on a length of fabric. (A, B, C, D, and A’, B’, C’, D’. Note that Point D and point A’ are at the same point.)
- Fold point B to Point D and point A to C. Pin the pleat in place.
- Fold point C’ to point A’ (which is also point D) and point D’ to B’. Pin the pleat in place.
- Sew both parts of the pleat into place.
There are still a couple of variations which are important for constructing Japanese clothing.
Stacking Pleats
If pleats are zig-zags of fabric, it is possible to add another zag of fabric, to add yet more volume. In the case of stacked pleats, a section of fabric will be shortened to one fifth of the original length, instead of one third. To make a stacked knife pleat:
- Mark six points on a length of fabric (A, B, C, D, E, F)
- Fold Point C to A, and D to B.
- Further fold point E to point A/C and F to B/D.
- Pin all five layers
- Sew down the pleat to secure the pleat.
Layering Pleats
If multiple pleats are set end to end, the fabric will always be shortened to one third of its original length. Sometimes, it may be necessary to shorten fabric further than this. This can be achieved by moving the start point of one pleat into the area covered by the previous one. For example:
- Mark four points on a length of fabric (A, B, C, D)
- Mark four more points on the fabric (E, F, G, H.) Point E should be between points C and D.
- Fold and pin pleat AD as normal.
- Fold and pin pleat EH as normal, noting that part of it overlaps pleat AD.
- If desired, pin the five layers in the overlapping section.
- Sew the entire set of pleats in place.
There’s More
This article is in three parts
- Part 1: Description and Measurements
- Part 3: Assembling the Hakama

Leave a comment