This construction tutorial is designed to be used for any unlined Japanese garment with a standard cross-over collar (tarikubi, 垂領, ‘hanging collar’) and small wrist opening. This includes:
- underlayers – usually divided into an invisible utilitarian undergarment called an asetori or hadagi, and the undergarment intended to be seen, sometimes called a shiroshita kosode (white under-kosode) and later called a juban, from the Portuguese gibão.
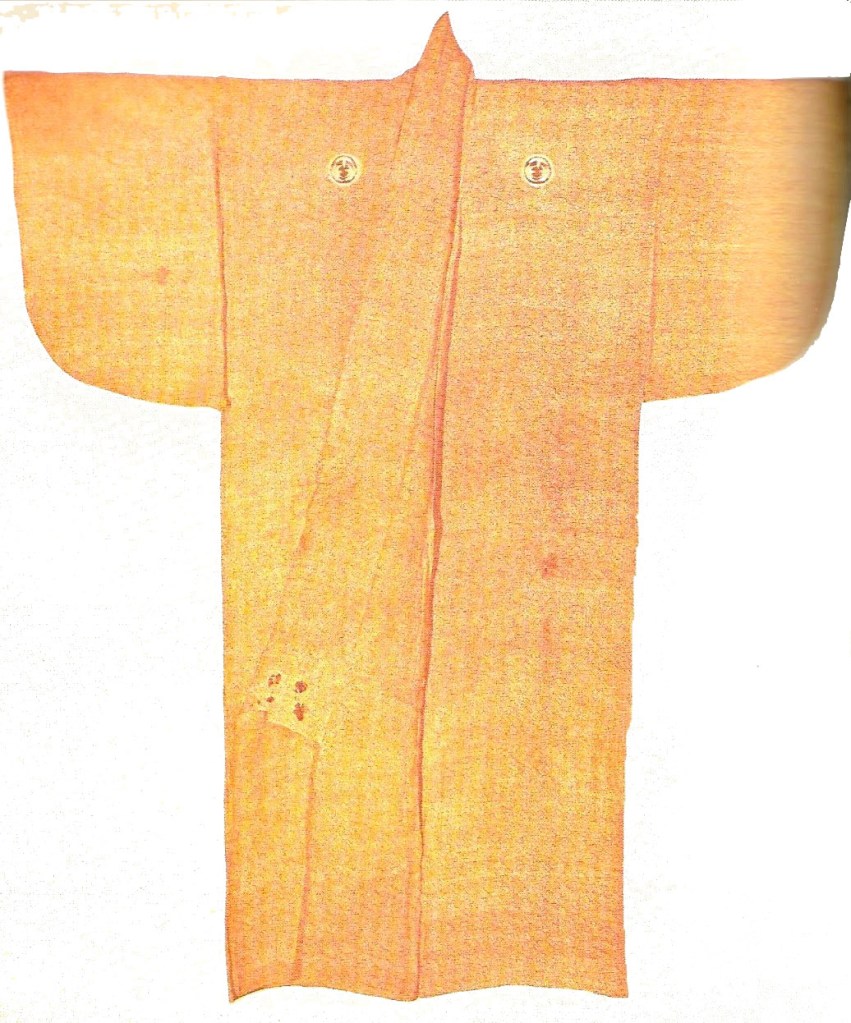
- katabira (帷子, ‘small curtain’) – summer garment made from breathable, lightweight fabric, usually hemp, ramie, or suzushi, a loosely-woven, stiff raw silk.
- hitoe (単, ‘unlined’) – unlined garments made of standard-weight fabric such as nerinuki silk or cotton (occasionally after the 1400s); extant hitoe are not nearly as common as katabira or lined garments (awase) in Muromachi-Momoyama periods; I only know of one still extant. Hitoe come in both kosode (small sleeve opening) and о̄sode (large sleeve opening) variations. Guides on seasonal clothes change (koromogae, 衣替え) often skip straight from katabira to awase (lined) in this time period, unlike modern kimono seasonality which uses hitoe as a transition from summer weight garments such as yukata or gauze kimono to awase.
The differences between these lie primarily in the choice of fabric, the proportions, and the sleeve finishing. Keep in mind that during the cooler half of the year, the middle and upper classes would have been wearing lined garments. Don’t be intimidated – they’re not harder to make! Lined Garment Construction
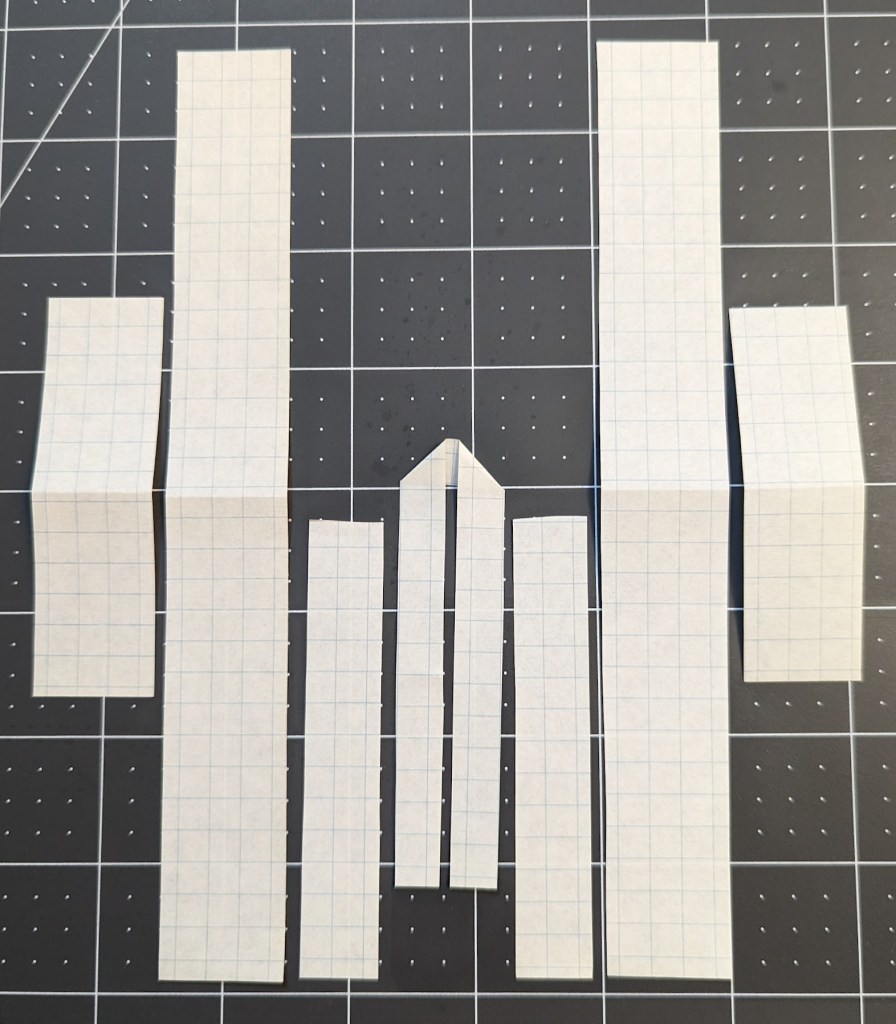
Before you start, you’ll need to cut out the pieces according to the post for the garment you’re making. If you don’t know what a kise is, also read the Wasai post. After that, we’re ready to go.
This tutorial uses a katabira pattern for demonstration purposes. If you are making a different garment such as a juban or hitoe, you would follow the same basic procedure using the appropriate pattern. Marking would normally be done using a creaser called a hera (箆, ‘spatula’), but a blue fabric marker is used here for better visibility.


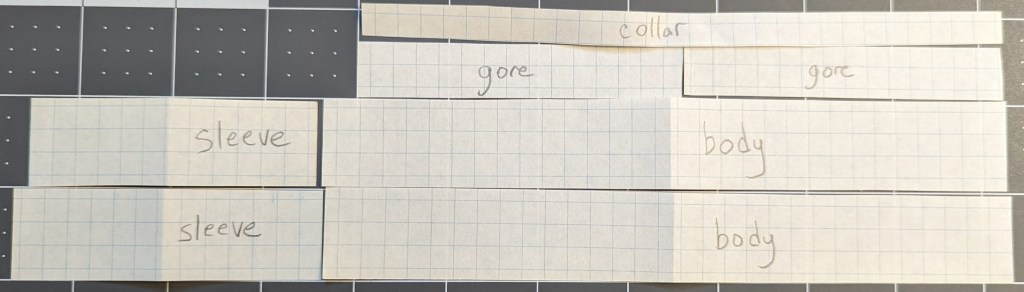
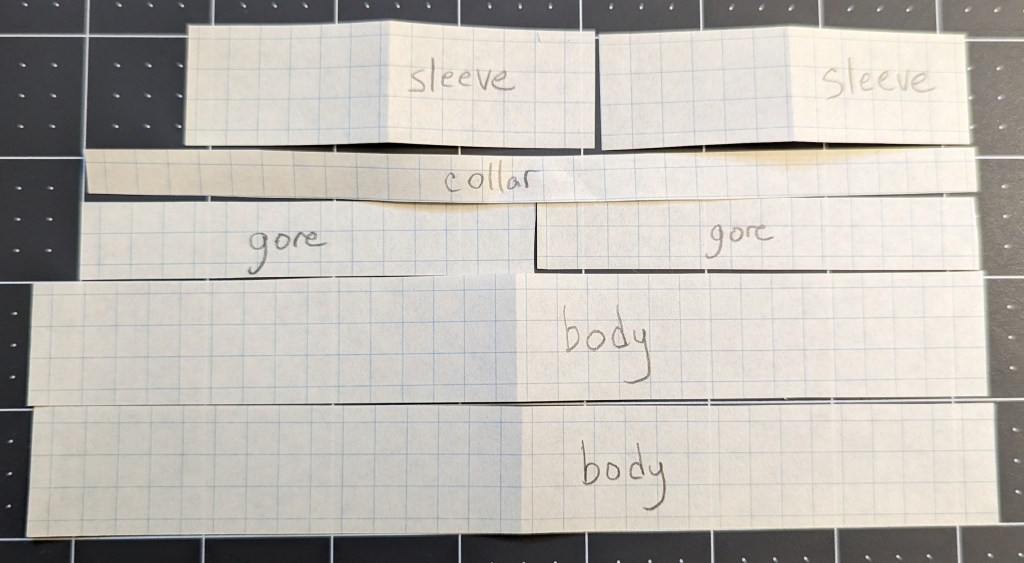
Basic layout of pattern pieces for katabira.
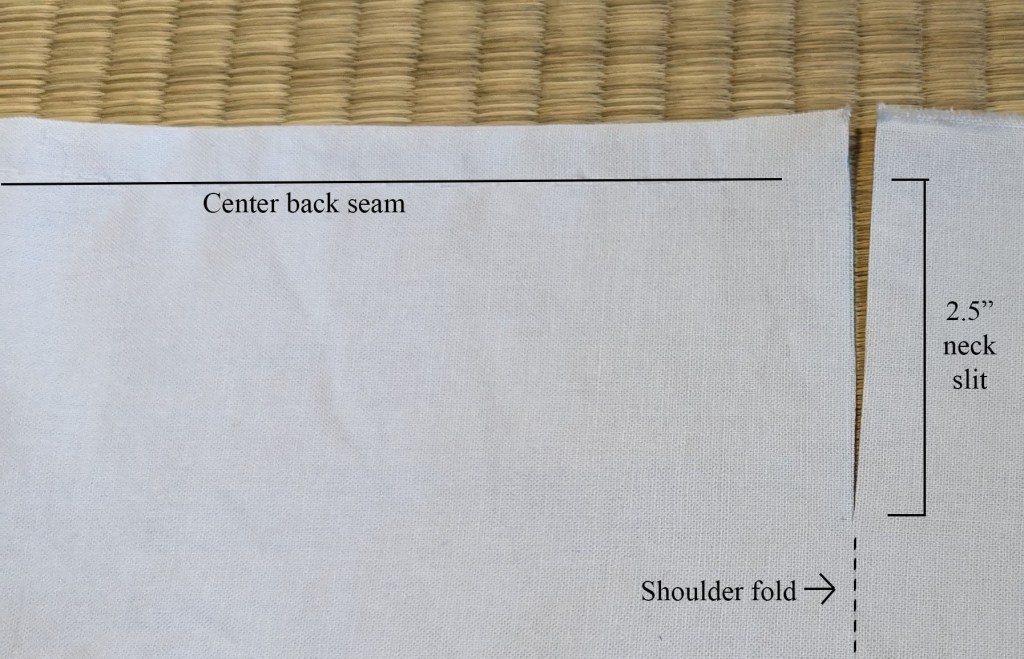
The neck slit is cut as a straight line exactly on the shoulder peak, 2.5″ in from your stitch line (not from the edge of the fabric) for a total slit width of 5″ when unfolded. If you have a particularly wide neck, you might need to make it a bit wider, but go slowly, since it’s easy to make it too big. The stitching of the center back seam stops 3/4″ short of the neck slit, allowing the collar to sit comfortably behind the shoulder peak.
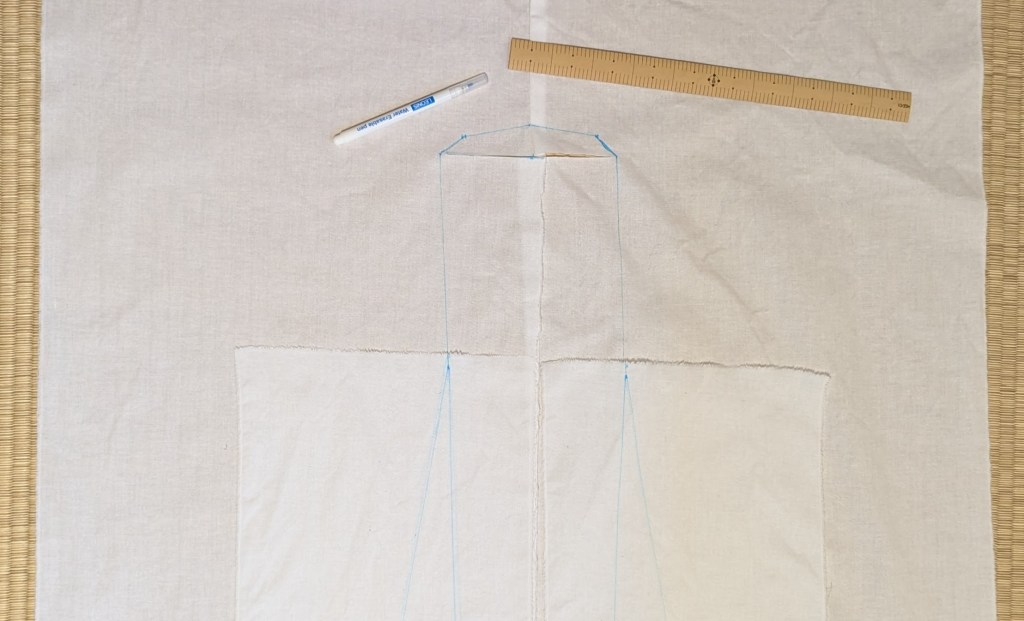
Next, unfold the fabric to mark the stitching lines. I recommend sewing the collar as a series of straight lines: the result is indistinguishable from a continuous curve, and it’s both far easier to sew and more plausible for a time and place where pins were not yet in common use.
Looking at the front of the garment, place dots:
- 3/4″ up from center of neck slit
- 1/2″ up and in from the ends of the neck slit
- 1/4″ outside the ends of the neck slit
- 1/2″ in from the ends of the neck slit and 1/2″ down from the top of the gore (okumi), marking this dot on the gores as well as the body panels

Finally, draw lines from the dot at the top of each gore.
The outer lines run from the dot to the point where the collar ends (14″ up from the bottom hem for this katabira). Kosode and katabira collars are typically knee-length – much longer than kimono collars.
The inner lines run from the dot to a seam allowance away from the inside bottom corners, and are now ready for stitching along those lines.
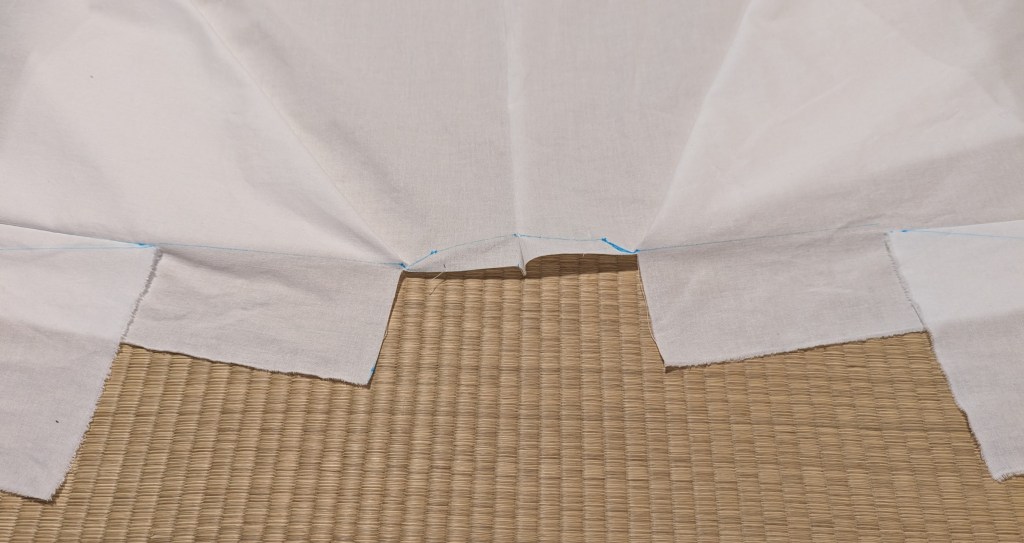
Spread the garment out as flat as possible.
Draw a line on the collar showing where the stitching should be placed, with a dot at the center.
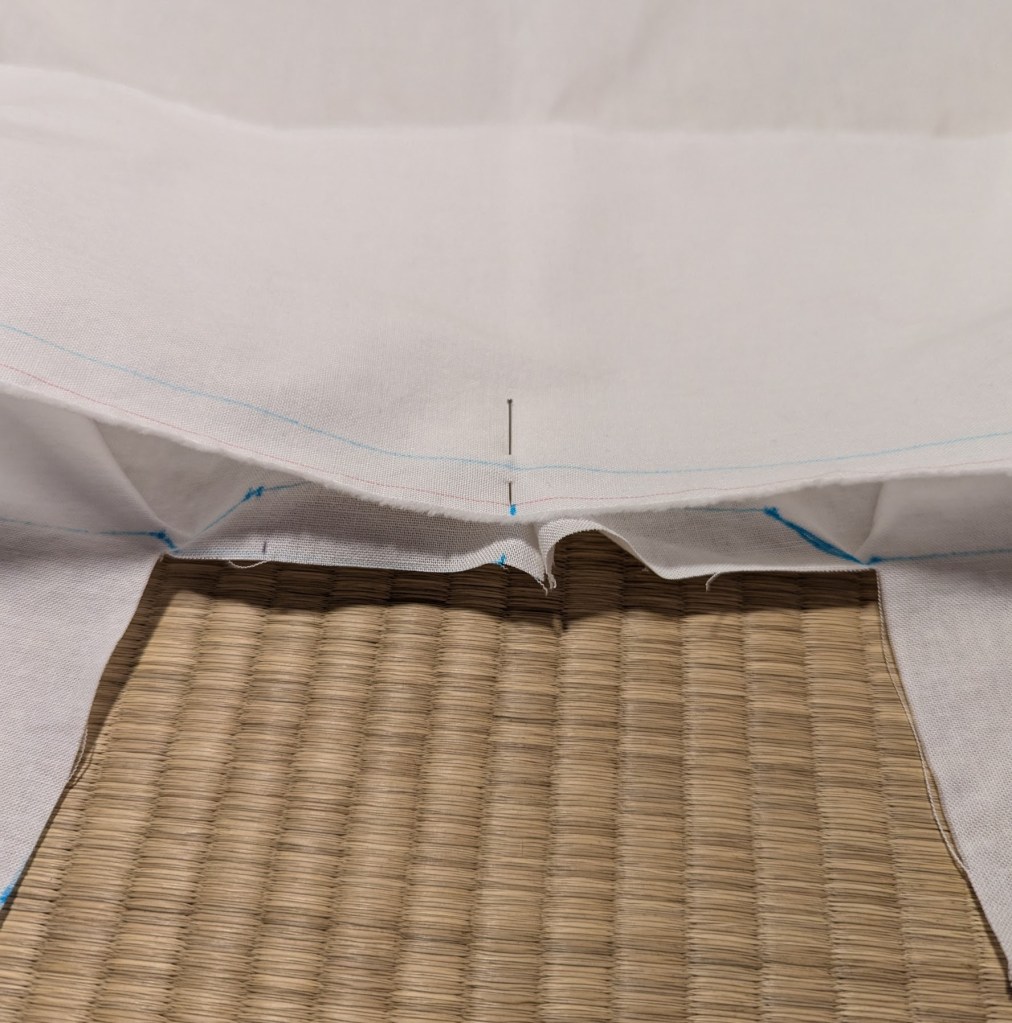
Place a single pin joining the center of the collar and the center back seam, aligning the stitch lines drawn on the collar with the stitch lines drawn on the body. Don’t worry about aligning the edges of the fabric, only the blue lines.
Sew one straight segment at a time, repositioning the fabric between each segment. When you get toward the end of the collar, make sure that the front edge of the gore is folded for hemming before sewing over it, and stop about three inches short of the end of the collar, so you can fold in the end later.
Remainder is still under construction! In the meantime check here for a full tutorial.
References:
- Jidai ishō no kitsuke. Ed. Nihon Wasō Kyōiku Kyōkai hen. Genryūsha, Tōkyō, 1982.
- Nihon no Bijutsu 67. Shibundō, Tōkyō-to, 1966-.
- Sawada, Kazuto. Basic Research on Katabira: Changes in Materials From the Muromachi Period to the Early Edo Period. National Museum of Japanese History Research Report Issue 125 March 2006.

Leave a comment