Dyeing is a lot like cooking: just get a book and follow a recipe! Here are some basic principles to get you started.
Before starting any dyeing method, weigh your dry fabric, then wash it with hot water and dye/perfume-free laundry detergent. Leave it to soak in water so that the fiber is thoroughly wetted, preferably overnight. For vegetable fibers like cotton and linen, add 1-2 tsp. washing soda per gallon of water (you can find this in the laundry aisle of any grocery store). For wool, avoid vigorous agitation (unless you want it to felt!). The idea is that you don’t want any residue or air bubbles to interfere with the dye reaching the fabric.
There are many variations in dyeing methods, but these are the most common.
| Direct Dyeing | Mordanted Dyeing | Vat Dyeing |
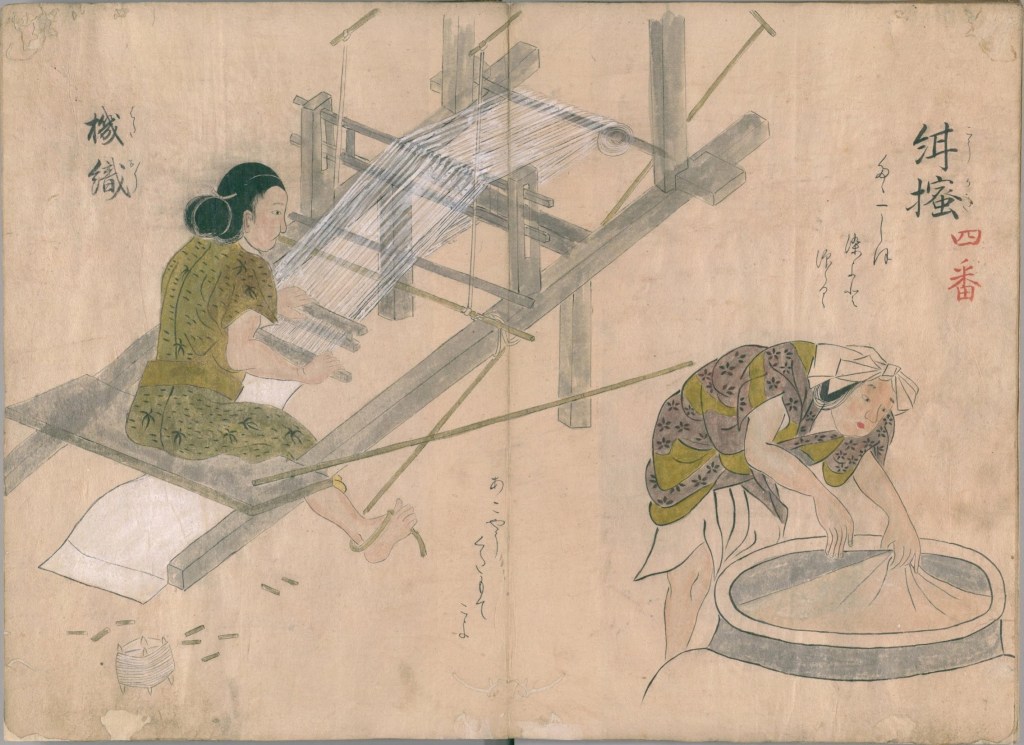
| Simmer dyestuff in water to create dye bath Simmer fabric in dye bath | To mordant: soak fabric in a solution of alum, iron sulfate, tannins, or another substance that helps the dye bind to the fabric While European dyeing often begins with a mordant, Japanese dyeing typically starts with the dye, then mordant, often continuing for many dye-mordant-dye cycles, which gives deep color and improved colorfastness | Primarily used for indigo, also for Murex purple Add dyestuff to hot water (50°C) Raise pH Remove oxygen Dip fabric, remove, and hang to oxidize Dip multiple times for deeper color |
Direct Dyeing:
If you’ve ever spilled tea on your shirt, congratulations, you’ve done direct dyeing! Only a certain subset of dyes work well without a mordant to help them bind to the fabric, but those that do include barberry, gardenia, safflower, and tannin-based dyes like oak, alder, and cutch.
Combine your ingredients in an nonreactive pot such as one made of stainless steel or coated in enamel. Reserve this pot for dyeing only; once it’s been used for dyes, it should never again be used for cooking, as some dyestuffs can be toxic. Make sure you know whether a dye is toxic before handling it!
The amount of dyestuff needed will vary according to which dye you’re using. For example, logwood produces a deep purple with a weight of dyestuff half the dry weight of the fabric, whereas lady’s bedstraw requires a weight of dyestuff four times the weight of the fabric to produce a deep red. If you’re experimenting with an unknown plant, try a 1:1 ratio; recipes will abbreviate this by saying that the amount of dyestuff you should add is 100% WOF (weight of fabric).
Once you’ve figured out how much dyestuff you need for the weight of fabric you’re dyeing, add enough water so that you can stir the fabric freely. If your tap water is high in iron or other minerals, you may need to use rainwater or distilled water to keep the minerals from changing the resultant color!
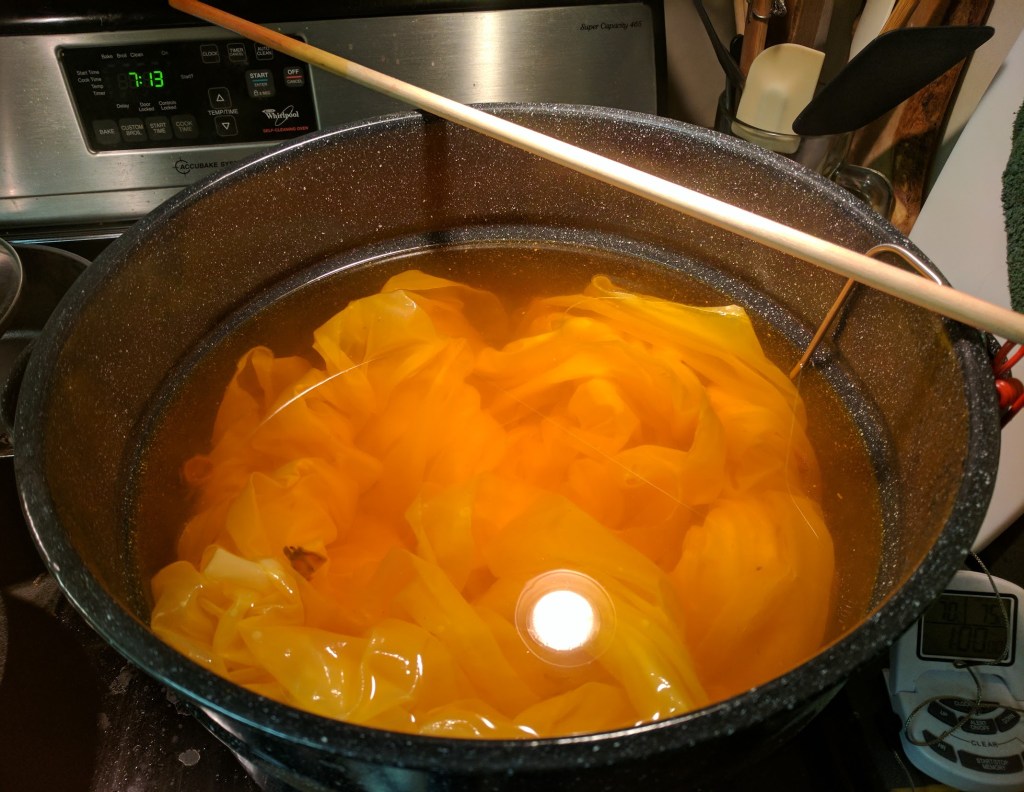
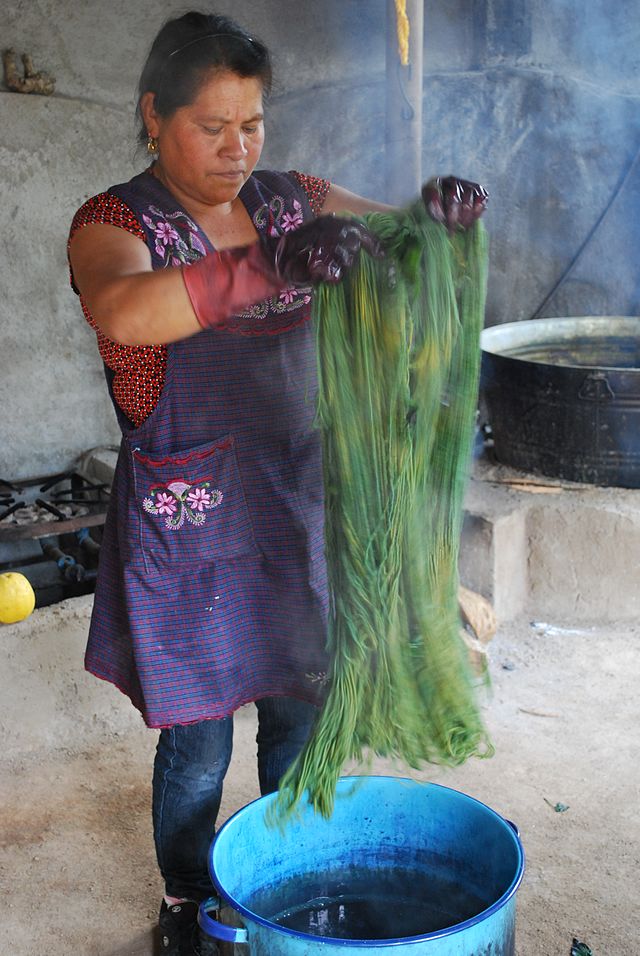
A typical recipe will call for simmering the dyestuff between 30 minutes and two hours, removing the dyestuff by pouring it through a sieve or removing the “teabag” if you used one (powdered dyestuff saves you this step), and simmering the fabric for another hour or two, stirring frequently.
Be sure to stick to the times and temperatures recommended by your recipe; some dyes turn brown or gray when overcooked, and silk can lose its luster if boiled. It’s helpful to use a kitchen thermometer to check the temperature. You can dye without a heat source if you’re willing to leave the fabric in the bath for a longer time (a week is not unusual), but some dyes, like logwood, will only give a good color with heat.
Different fabrics respond differently to the same dye bath; silk and wool take color most easily, cotton almost as well. Linen is notoriously stubborn and may require a higher concentration of dye and a longer simmer. Silk and cotton turn completely different colors in a safflower dye bath! Always dye a test swatch before dyeing enough fabric for a full garment.
Mordanted Dyeing:

European dyeing methods often called for mordanting the fabric prior to dyeing, while Asian methods more often dyed first, then mordanted, sometimes continuing for multiple dye/mordant cycles to deepen the color and make it last better (increasing its “fastness”). You can mordant fabric and store it to be used as needed, but keep in mind that excess iron can degrade fibers over the course of years.
Alum may be familiar to you in its everyday uses: pickling, crystal deodorant, and styptic pencils. The specific type of alum most often used in dyeing is potash alum, also known as potassium aluminum sulfate. There are other kinds of alum that may give different results, so check the chemical name before you buy. Alum typically makes dyes brighter and more colorfast.
- To mordant animal fibers with alum, use 8% the weight of the fabric, and add 7% cream of tartar to help the alum bind to the fiber. Simmer the fabric in the bath for an hour, stirring frequently, then let the fabric cool in the bath, making sure it stays under the surface of the liquid. If the fabric refuses to stay submerged, put a plate or other weight on top to keep it under. Once the fabric is cool, rinse away the excess alum and either dye immediately or dry to use later.
- To mordant vegetable fibers with alum, first pre-mordant with tannin. Use 20% oak galls or other powdered tannin to the weight of fabric. Simmer the galls for an hour, strain, and soak the fabric in the liquid for 8-24 hours. Rinse well, then go on to the alum. Make a bath of 20% alum and 6% washing soda (the tannin and washing soda both help the alum bind to the fiber). Add the fabric, bring to a simmer, and let the fabric cool in the bath for 8-24 hours. Dry the fabric without rinsing (the mordant will be rinsed away when wetting the fabric for the dye bath).
Iron is typically used as a mordant in the form of ferrous sulfate. Ferrous acetate can also be used, or an iron pot. To make your own ferrous acetate, combine scrap iron such as steel wool or rusty nails with a mixture of 2 parts water to 1 part vinegar and allow the iron to dissolve for at least a week. Iron typically darkens colors, and does so at low concentrations. Tap water with high iron will darken your results, as will using your iron mordant pot for other dyeing. If you have iron mordant on your hands, you can leave dark fingerprints on your fabric!
- To mordant animal fibers with iron: excess iron can degrade animal fibers, making them brittle and causing earlier deterioration, so don’t use more iron than 2% the weight of the fabric. Dissolve the iron into the mordant pot, add the fabric, heat, and simmer for 10-15 minutes, stirring constantly. Allow the fabric to cool in the bath, then remove and rinse well.
- To mordant vegetable fibers with iron, use animal fiber procedure, but simmer for 30 minutes.
Once your fabric is mordanted, be sure to rinse it thoroughly before you continue as for direct dyeing, simmering the mordanted fabric in the dye bath.
Vat Dyeing:

This method is used for indigo and shellfish purple (which requires a prohibitive number of snails and so is no longer used on a large scale). Indigo is far and away the best and most common natural blue dye. The precursor to the indigo dye molecule is produced by many unrelated plants throughout the world, such as dyer’s indigo in the bean family, dyer’s knotweed in the buckwheat family, and woad in the cabbage family. However, to turn the precursor into dye, you must increase the pH and decrease the amount of oxygen in the bath.
Here’s the chemistry: the precursor molecule needs to go through a series of reactions to allow it to bind to the fabric and turn blue. In an alkaline solution, the precursor indican is hydrolyzed to indoxyl, which can bind to the fabric. Indoxyl oxidizes to form the water-insoluble blue dye indigotin, which can then be reduced to form the water-soluble but colorless leuco-indigotin. Don’t worry, you don’t need to memorize all that to get it to work!
What this chemistry means to us on the practical level is that indigo requires an alkaline, oxygen-deprived solution in order to dye fabric. (Oxidized indigo can be combined with a binder to create paint, but oxidized indigo without a binder will rub right off the fabric; this rubbing is called ‘crocking’.) Historically, ingredients like wood ash lye or stale urine were used to make the pH alkaline, and fermentation was used to remove the oxygen. However, since fermentation is time-consuming and smelly, modern dyers often use a reducing agent such as Thiox (thiourea dioxide) instead.
There are many variations on this theme in various places and times, but here is a basic modern recipe for a 1-gallon indigo vat similar to the indigo tie-dye kits readily available. Use basic precautions for working with chemicals: work in a well-ventilated area (preferably outdoors), wear gloves, use N95 mask while handling powder, do not get in eyes. If you do, wash immediately and seek medical attention.
Fill a 1-gallon unreactive container with 50°C water. Add 1 tsp. pre-reduced indigo crystals (NOT “natural indigo”), 2 tbsp soda ash, and 3 tbsp thiox. Stir, cover, and allow to sit for an hour for the chemical reactions to take place. To dye, remove the blue top layer, squeeze the wet fabric, and, holding it squeezed to minimize air introduction, plunge it under the surface. Once under, relax your grip and swish the fabric for 5-10 minutes. Squeeze to pull out, and spread or hang flat so the oxidation can work its yellow-to-blue magic! Once blue, repeat the process if a darker color is desired. Further dips should only be for 3-5 minutes to avoid reducing the dye bound to the fabric, allowing the dye to rinse off. Once the dye is fully oxidized (I prefer to wait until the fabric is completely dry), run it through the laundry multiple times – any residual thiox can yellow the fabric.
Where to purchase supplies:
You can get started with dyeing using turmeric, tea, clove, and other kitchen dyes. Some common landscaping plants also work well, such as black walnut, barberry, and pagoda tree blossoms. You may be able to find some dyes such as gardenia fruit at your local natural foods store, and indigo kits can be found in craft stores. Reputable online suppliers include Dharma Trading Co., Maiwa, and Monterey Bay Spice Company. You can find dyes on Amazon, Etsy, and Ebay, but you’ll need to check the reviews on each individual supplier. A good selection of dyes can also be found among the vendors at Pennsic.
I highly recommend Jenny Dean’s books for beginners! They’re detailed, safety-oriented, and easy to understand.
References:
- Cardon, Dominique. Natural Dyes: Sources, Tradition, Technology and Science. Archetype Books, 2007.
- Dean, Jenny. Wild Colour. Mitchell Beazley, 1999.
- Prideaux, Vivien. A Handbook of Indigo Dyeing. Search Press Ltd, 2003.

Leave a comment